

Reading time: 9 minutes
Introduction
When it comes to repairing your ASUS laptop, the biggest challenge for most people is a lack of experience and knowledge. This article serves as a general guide to assist you in disassembling and reassembling your ASUS laptop. Before we dive into the specifics, let's start with some essential but often overlooked guidelines.
Setting up your Workspace
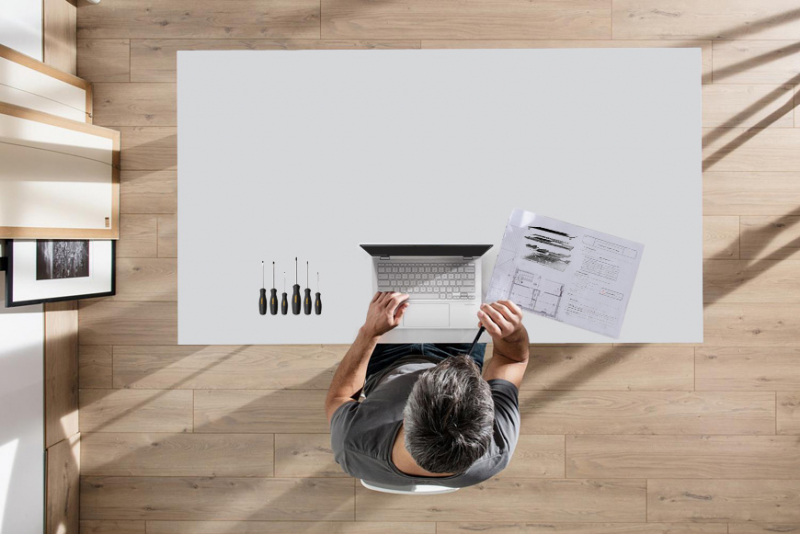
- Work Space: Find a clear, dry, and clean flat surface to work on. Avoid using your kitchen table or coffee table.
- Proper Lighting: Ensure good lighting for a focused workspace.
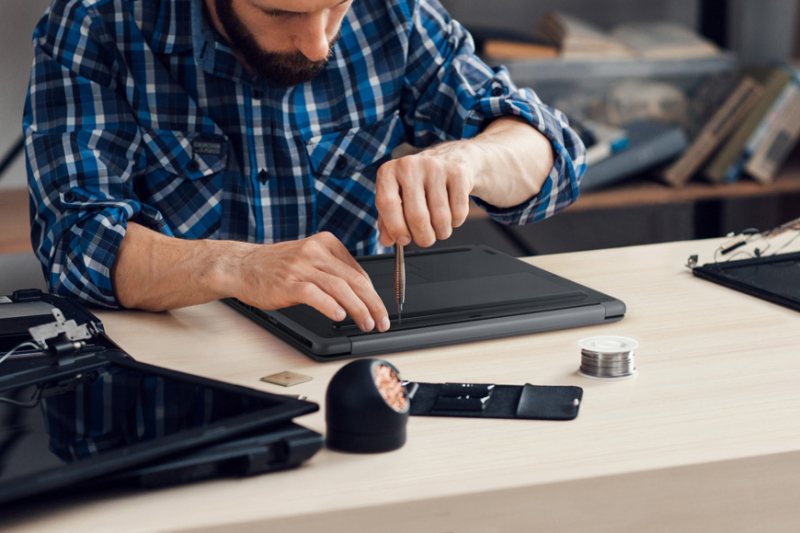
- Small Containers/Magnets: Use these to hold screws and small parts.
- Notebook or Device: Have something to take notes.
- Camera: Take pictures as you go along.
- Replacement Parts: Clearly identify them.
- Proper Disassembly Tools
- Air Duster, Cotton Swabs, and Alcohol
- Thermal Paste may be required
General Procedure
Disassembly: Taking it Apart - Careful and Methodical
1. Take pictures and notes at each step; number each step and list all the parts.
2. Keep all parts from a specific step together in an identified spot.
3. Take your time and clean off dust and dirt as you go along.
Assembly:
1. Proceed in reverse order using the steps above (reverse order) - Yes ! This sounds simple and obvious, but often the simplest solutions work best!
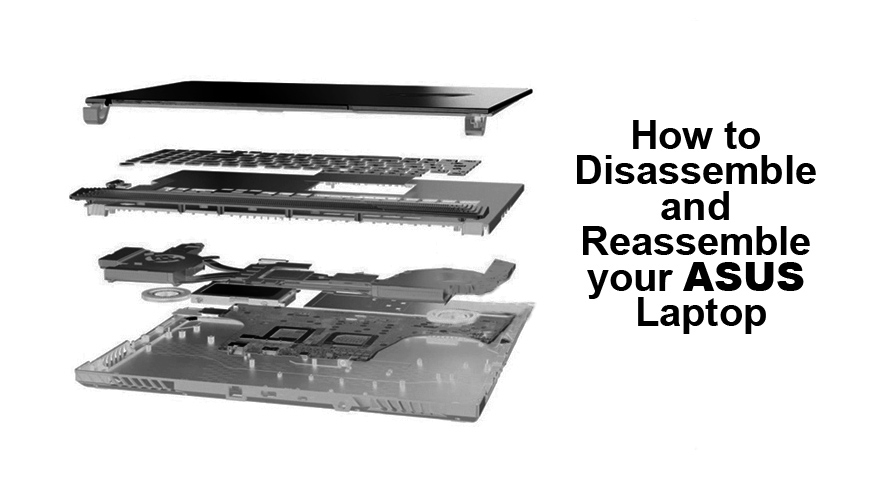
Disassembly (Teardown)
This article will guide you through a generic teardown. However, you'll only need to perform a full laptop disassembly if you're replacing a motherboard or laptop chassis. Most repairs or replacements will require only a few of these steps. You can use this guide to help you recognize each part.
Outline of the Process
- Remove the power supply and battery.
- Remove accessible components.
- Remove the Hinge Cover(s)/Keyboard.
- Remove cables under the keyboard.
- Remove the Display.
- Separate the Screen from the LCD cover.
- Other components and connectors.
Before proceeding, become familiar with the parts and cables you'll encounter. You may want to use this guide to help you identify these parts.
1. Remove the Power Supply and Battery
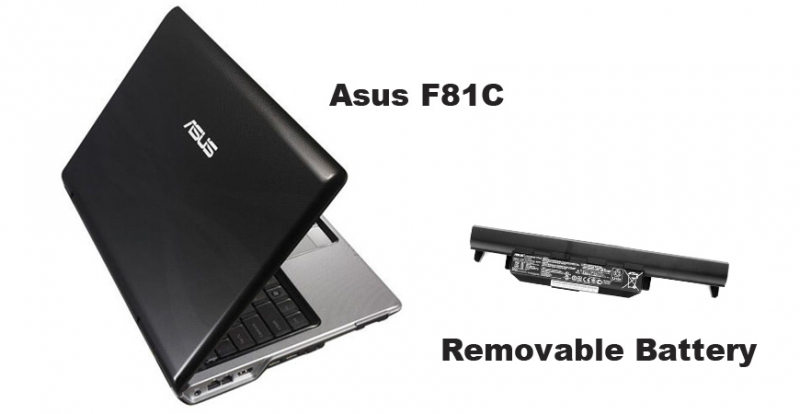
Laptops With a Removable Battery:
- Disconnect your PC from any AC outlet and turn it off.
- Turn your computer over and find the latches that hold the battery hatch.
- Open the latches and remove the battery.
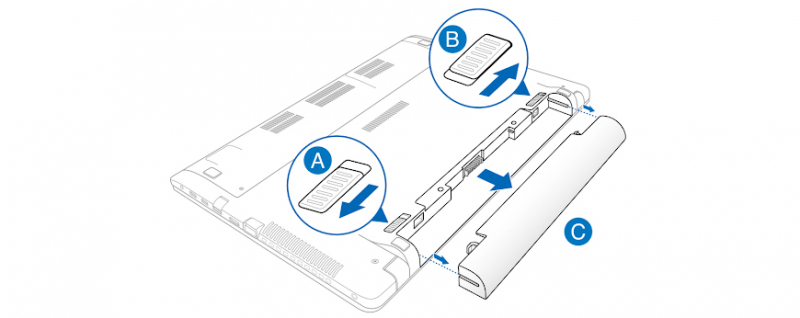
Laptops Without a Removable Battery:

These are seen in the latest generations of laptops. The batteries are often directly attached to the chassis and not easily accessible.
Below is a general procedure to remove/replace the battery for this type of laptop:
- Disconnect your PC from any AC outlet and turn it off.
- Turn your computer over and remove the various screws on the bottom case.
- Using a standard screwdriver or a card, gently wedge open the space separating the bottom case of the laptop from the keyboard.

CAUTION: When attempting to separate the keyboard from the bottom case, a cable connects the two. You will need to delicately disconnect one of its connectors before separating.
The battery is usually located under the keyboard, beside your screen and is also connected by a cable. Unplug the cable, remove the old battery, replace it with the new one, and then carefully repeat the steps in reverse to reassemble the computer.
You may want to use this guide to help you select and change the battery.
2. Remove the Accessible Components
How to Remove Screws from a Laptop
You'll need appropriate tools. Keep track of screws, especially when removing a cover (Hard Drive, RAM cover, etc.). You can use a piece of tape to hold the screws in place or keep them in a container to label them. If screws get stuck, tapping the underside gently might help. To avoid this issue, you can place a bit of steel wool in the screw head before using the screwdriver.
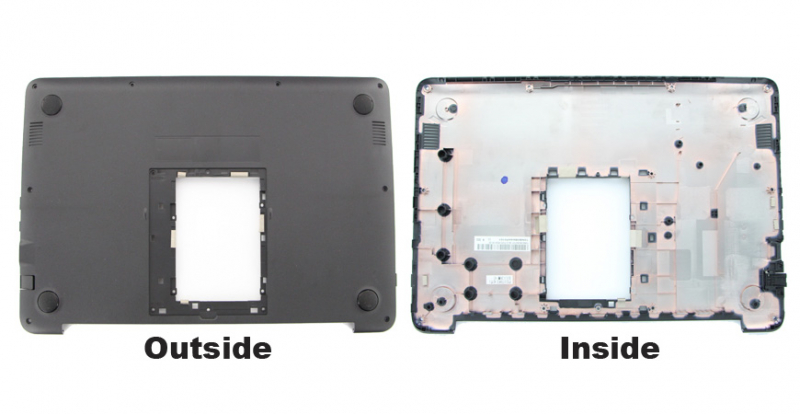
The bottom case of each laptop has a different number and set of screws. The number and type of covers will also differ. Remember to take pictures and notes (number them) before and after removing the covers and parts. Undo the screws from all the covers that house the components on the underside of the laptop. Check for a single screw beneath the DVD drive with a CD picture next to it; this screw holds the CD/DVD drive in place. Do not lose this screw. Lay out the screws in a cleared area of your workbench in the same arrangement as they were on the laptop.
If you need to replace the bottom case or any of the covers on the bottom case, you can refer to this link.
If you can't find a part on our site, we are here to help at contact@asus-accessories.com.
The Hard Drive
Remove any screws holding it in place. Pull the drive straight out (do not twist) in the opposite direction of the pins. The drive should come out easily. Place it on top of its cover.
If you're looking for a new hard drive or SSD, refer to this link.
RAM
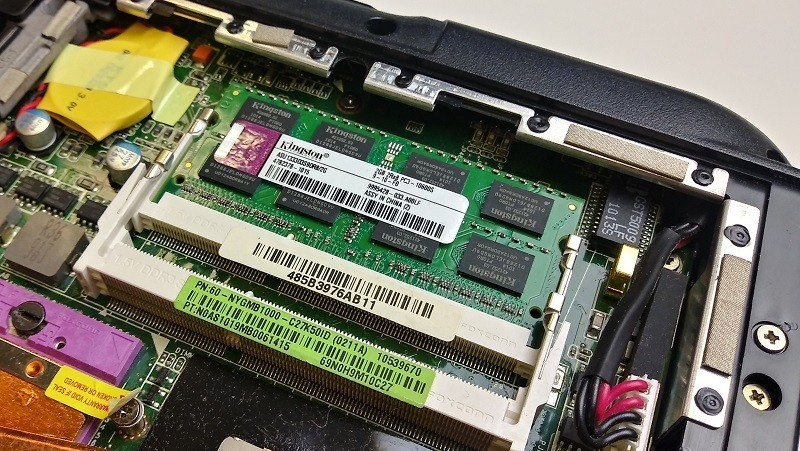
Beware of static. There are clips on either side of the RAM sticks that push outward. It is advisable to use a plastic tool whenever possible to prevent any static discharge from occurring. Once released, the RAM will pop up at a 30-degree angle. Remove the RAM sticks and place them on top of their cover in the cleared area of your desk. If you want to add RAM, you can refer to this link.
There may be more covers that you can remove or not. If you can see more, then keep going until all covers and components have been removed.
Wireless Card
There is a small gold-tipped cover that you can pry off with minimal effort. This is the wireless antenna. The wireless card itself can be removed in the same manner as the sticks of RAM. Remember to remove it at a 30-degree angle. If you see a heat sink under a cover, leave it in place for now. Removing it could damage the CPU.
3. Remove the Hinge Cover(s)/Keyboard
Hinge Cover
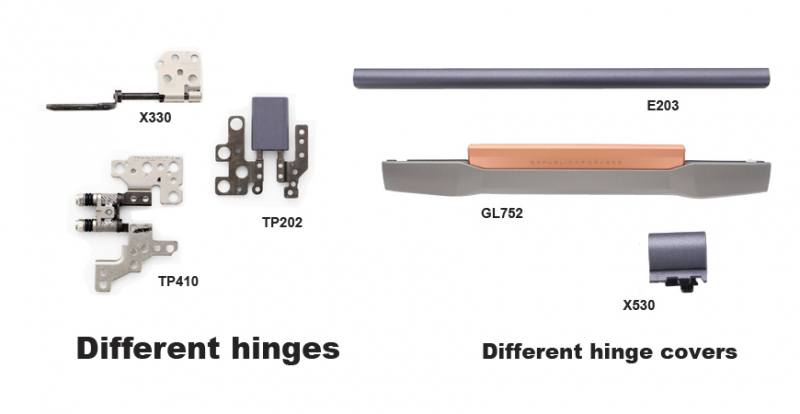
Some ASUS models have a single hinge cover, while others have two, and some may not have one at all. They usually clip on. Be aware that you may need to disassemble the screen and/or remove the top case before removing the hinge cover. If there is a notch, you can use a small flathead screwdriver to pry it off, but do not force it. If it doesn't come loose with a small amount of force, something is retaining it. Hinge covers are one of the most common parts that need replacement. If you can't find the correct hinge cover on our site, we are here to help at contact@asus-accessories.com.
Keyboard/Touchpad
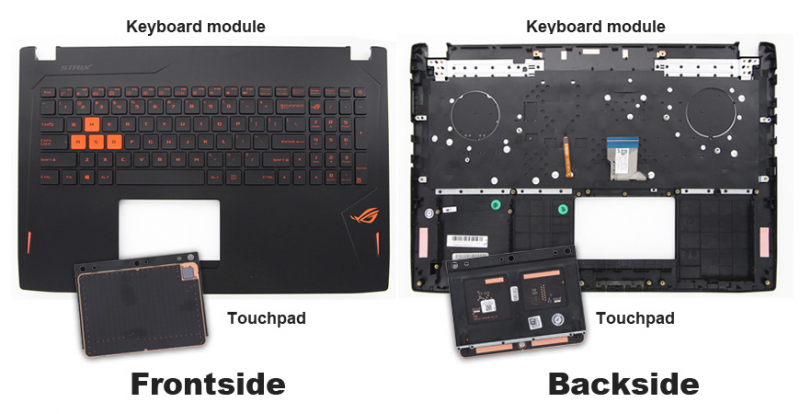
- Separate the keyboard plate from the main housing using a plastic prying tool, being careful not to damage the LED indicators or other peripherals. Be patient during this process. - Carefully disconnect the LED, trackpad, and keyboard ribbon cables (use your fingers or a spudger tool). - Take pictures and notes to remember where they were attached. - The keyboard can now be removed. - The touchpad will be attached to the back of the keyboard assembly. Remove the screws to detach it. Please note that the touchpad has a covering made of Mylar to protect it and give it the proper coloring. If you are replacing the touchpad, you should buy the Mylar along with the new touchpad.
4. Remove Any Other Cables Under the Keyboard
- Take a picture of the whole setup below the keyboard. - Take pictures of the individual connections/connectors (note which cable goes where). - Note the orientation of the device when you take these pictures and notes. - Remove the ribbon cables. There are several types of connectors, so ensure you are pulling in the correct direction (do not twist). Some connectors have plastic caps/plugs and simply pull out.
Note: When replacing a keyboard, make sure to select a keyboard with the layout you prefer.
5. Remove the Display
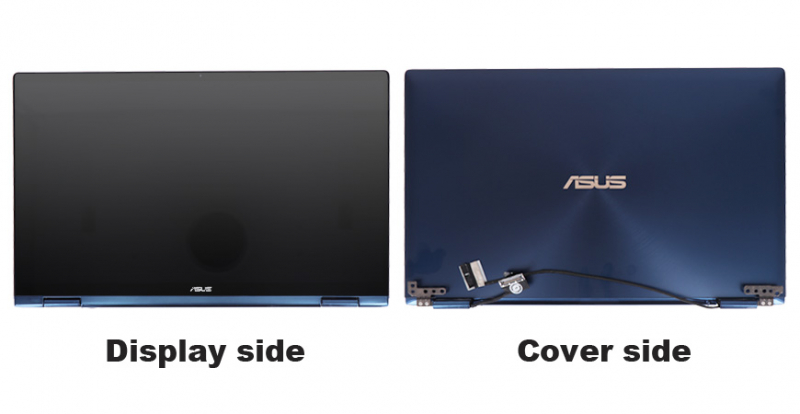
You will need to remove the antennae cable and the LVDS/EDP cable. These cables can be connected in various ways, but removal is usually straightforward. Take out the hinge screws for the display assembly; sometimes they are on the back, and sometimes they are inside. Be gentle with the screws to avoid stripping them. If you lose or damage a screw during this process, you can buy the entire kit of screws for your specific laptop on our site. If you can't find them, we can help at contact@asus-accessories.com.
6. Separating the Screen from the LCD Cover
The screen bezel (framing the screen) may be held in place by a set of screws that are hidden by some rubber covers usually found on the lower left and right and matching the color of the bezel. You will need to remove these screws and catalogue them.
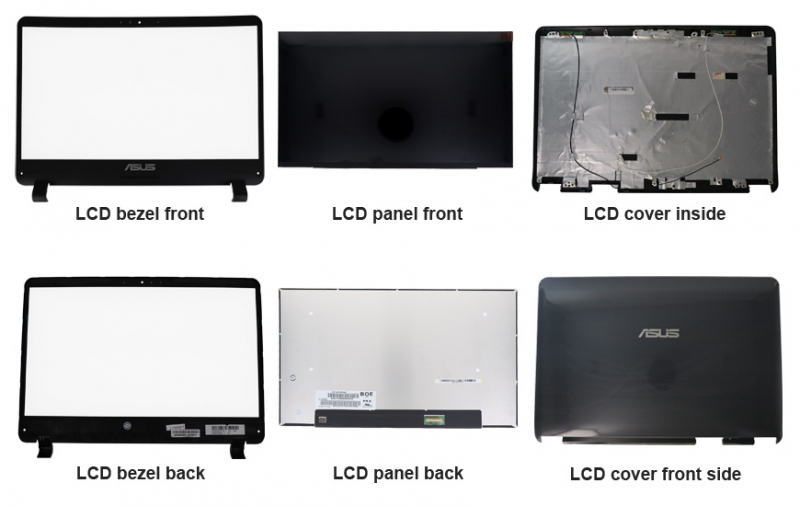
Start separating the screen bezel from the back cover on the top side of the display, somewhere around the webcam. You'll have to carefully pull near each hidden latch to detach it from the back cover. Remove the screws attaching the LCD screen to the hinge brackets. Now you can access the connector on the back of the LCD screen and unplug the video cable (LVDS/EDP cable). You can now separate the screen from the LCD cover. If your screen needs to be replaced, all you need is the serial number of your laptop, and we will link you to the correct ASUS replacement screen for your specific laptop at contact@asus-accessories.com.
The bottom case from step 4 contains the "guts" of your PC, including the motherboard, fans, heat sinks, IO card, connectors, etc.
WARNING: Static can damage the motherboard.
Note on Connectors: Some connectors are built into the bottom case and require replacing the entire bottom case to repair. Others are part of a daughter board, and others are available for purchase separately but may require soldering. Remove all screws securing the system board, the power board, the video board, etc. Disconnect all cables connecting the boards. Use the screw numbers as a guide for fitting and removal. At this point, you can break the laptop down to its components, including removing the motherboard.
The CPU Fan, GPU Fan, and Heat Sink
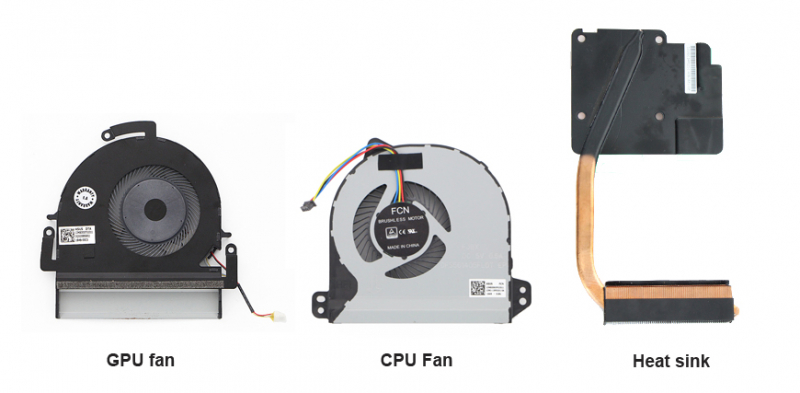
These should be accessible at this point. Depending on your model, you will have a single CPU fan or two fans (CPU and GPU), usually found in gaming laptops. You may also find that ASUS has a complete thermal module, including both fans and the heat sink, as a single component assembly. These are held down by a few screws and are fairly simple to remove. To help diagnose and troubleshoot any overheating issues, you can refer to this link.
The Motherboard
Please do not remove the motherboard unless it is absolutely necessary. The motherboard is usually the last part you remove. Slowly take the motherboard out and feel for where the pressure seems to keep the board in place. It should come out with no pressure. You will need a clean, dust-free surface to set the motherboard down.
Putting It All Back Together
The process is simply the reverse. Using the numbered pictures and notes, reverse the steps. Don't rush the process. Make sure that you have properly connected the ribbon cables, boards/cards, antenna, etc.
Disclaimer
This information is provided for informational purposes only. We accept no liability for damage caused to your device while following these instructions.
Note: If your laptop is still under warranty, disassembling the laptop may cancel any guarantees and violate the terms of the warranty.
Conclusion
We hope this guide has helped you understand the process of disassembling and reassembling your ASUS laptop. Following these steps carefully and patiently can help you perform various repairs or upgrades to your laptop. Remember, if you're uncertain or uncomfortable with any step, it's always a good idea to seek professional help to avoid any accidental damage.
If you have any questions, concerns, or need further assistance, please don't hesitate to contact us. Our team is here to help you with any ASUS laptop-related issues you may encounter. Your satisfaction is our priority.
Thank you for choosing ASUS, and we wish you the best of luck with your laptop repair or upgrade endeavors!