

Reading time: 2 minutes
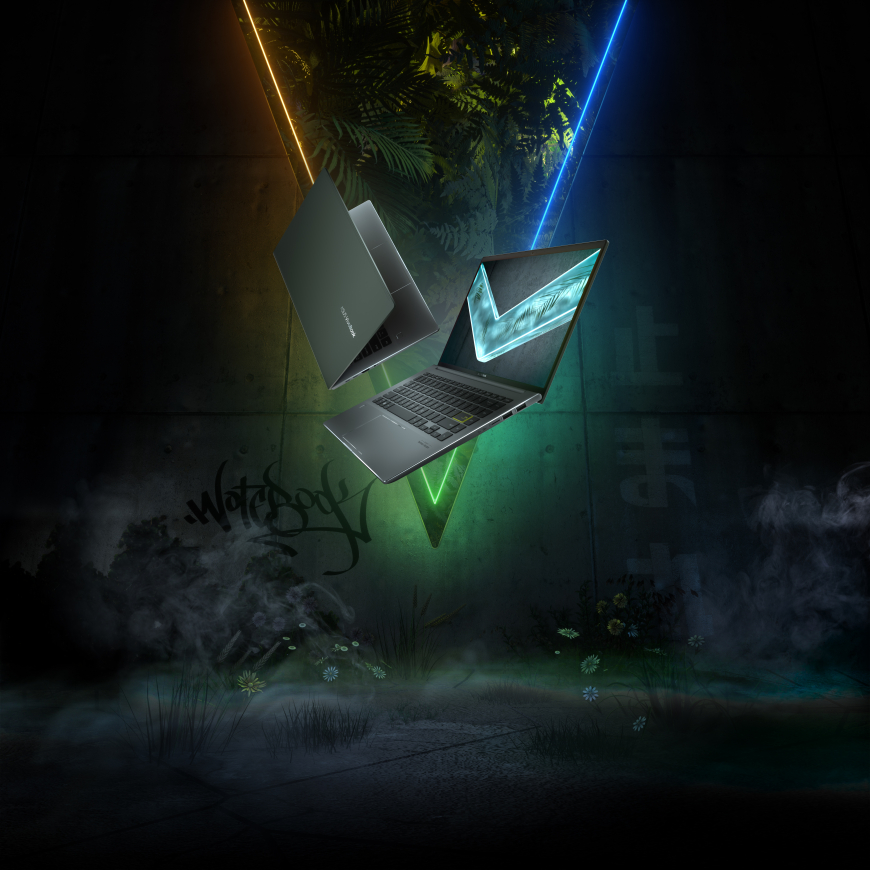
Meet the VivoBook S14 Series
The ASUS VivoBook S14 laptop series is an excellent choice for those seeking a sleek and powerful laptop. One of its key features is its thin and lightweight design, making it easy to take with you wherever you go. The 14-inch Full HD NanoEdge display (X430UA) is also a highlight, providing a larger screen-to-body ratio and an immersive viewing experience. The latest 11th Gen Intel Core i7 processors deliver fast and efficient performance, while the fast solid-state drive (SSD) provides speedy boot times and quick access to your files. Additionally, the laptop's long-lasting battery can last for up to 12 hours, making it perfect for on-the-go use. The ErgoLift hinge raises the keyboard to a comfortable typing angle, and the backlit keyboard (X430UA) makes typing in low-light conditions a breeze. The built-in fingerprint sensor allows you to log in quickly and securely without typing a password. Finally, the VivoBook S14 is available in several different color options, allowing you to choose one that suits your style. Overall, the ASUS VivoBook S14 laptop series is a well-rounded and stylish option for anyone in the market for a new laptop.
How to disassemble an Asus VivoBook S14 laptop
There are various reasons why someone might need to disassemble their laptop. One common reason is to upgrade the laptop's components, such as RAM or the hard drive. This is especially important for individuals who use their laptops for resource-intensive tasks like gaming or video editing, where upgrading the components can improve the laptop's overall performance.
Disassembling a laptop can be a daunting task, but with the right tools and guidance, it can be a relatively simple process. In this article, we will guide you through the steps to disassemble an ASUS VivoBook S14 laptop as shown on our YouTube channel, A-AccessoriesTV. Before starting the disassembly process, it is important to make sure you have the right tools. You will need a set of screwdrivers, including a small Phillips head screwdriver and a flat-head screwdriver. You may also need a plastic prying tool to help remove the laptop's cover. Luckily, all these instruments are available on our site in a convenient disassembly tool kit perfect for repairing laptops, desktops and smartphones.
Step 1: Power Off and Disconnect Cables
Before you start disassembling your ASUS VivoBook S14, ensure it is powered off and disconnected from any power sources or peripherals. Remove the battery if possible.
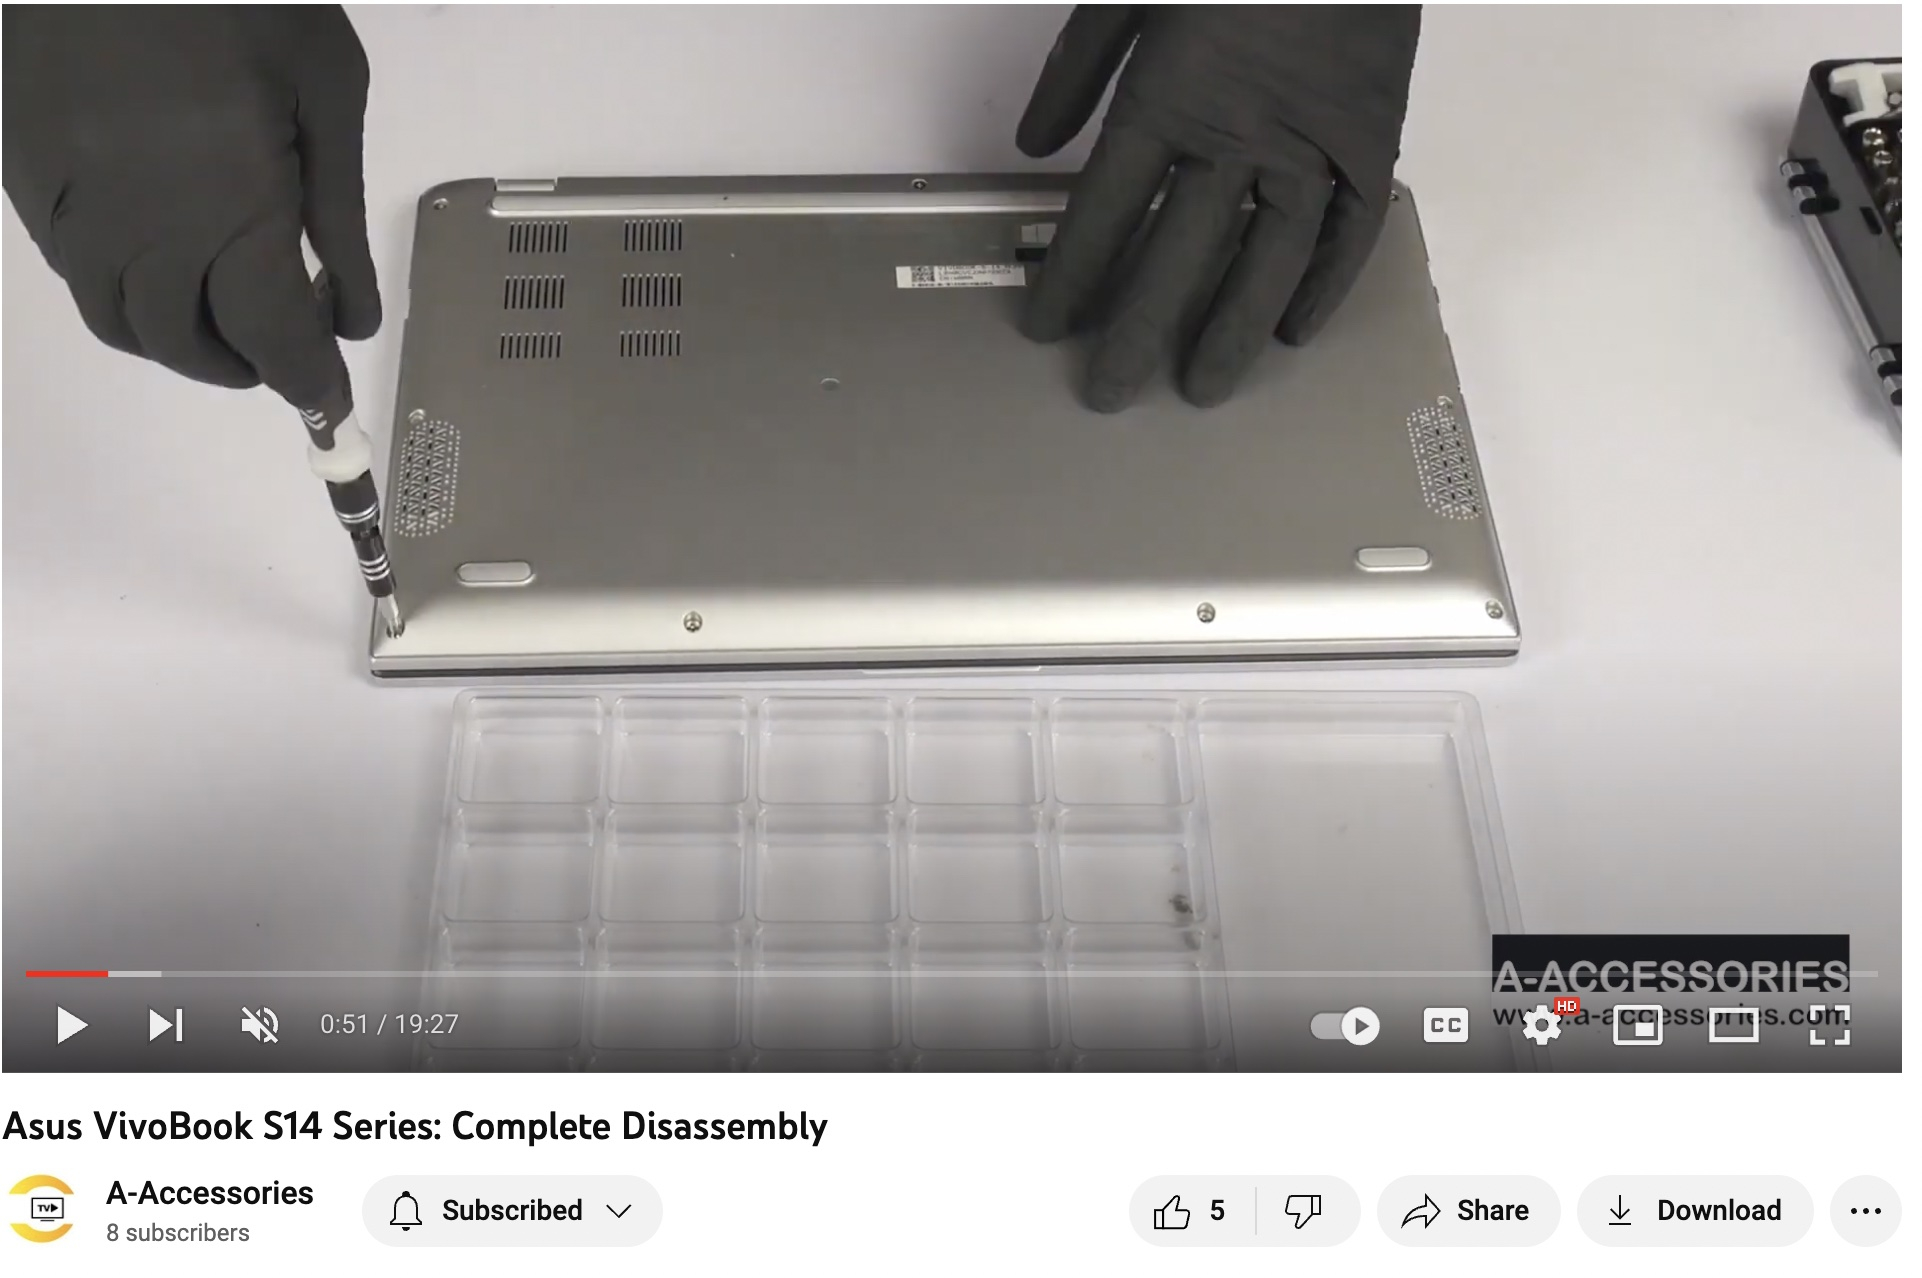
Step 2: Remove the Bottom Cover
The bottom cover of the ASUS VivoBook S14 is held in place by several screws. Flip your laptop over to locate these screws, and use your Phillips head screwdriver to remove them. The screws are usually located on the back and the sides of the laptop. Once all screws have been removed, gently lift the bottom cover off the laptop. You may need to use a plastic prying tool to help remove the cover, but be careful not to damage the cover or any of the components inside.
Step 3: Disconnect and Remove Components
Now you can disconnect and remove any components that need to be replaced or upgraded. This may include the hard drive, memory modules, Wi-Fi card, and more. You can locate replacements for all of these laptop parts on our site! To disconnect these components, locate the connectors and gently pull them apart. Be careful not to damage any of the connectors or components.
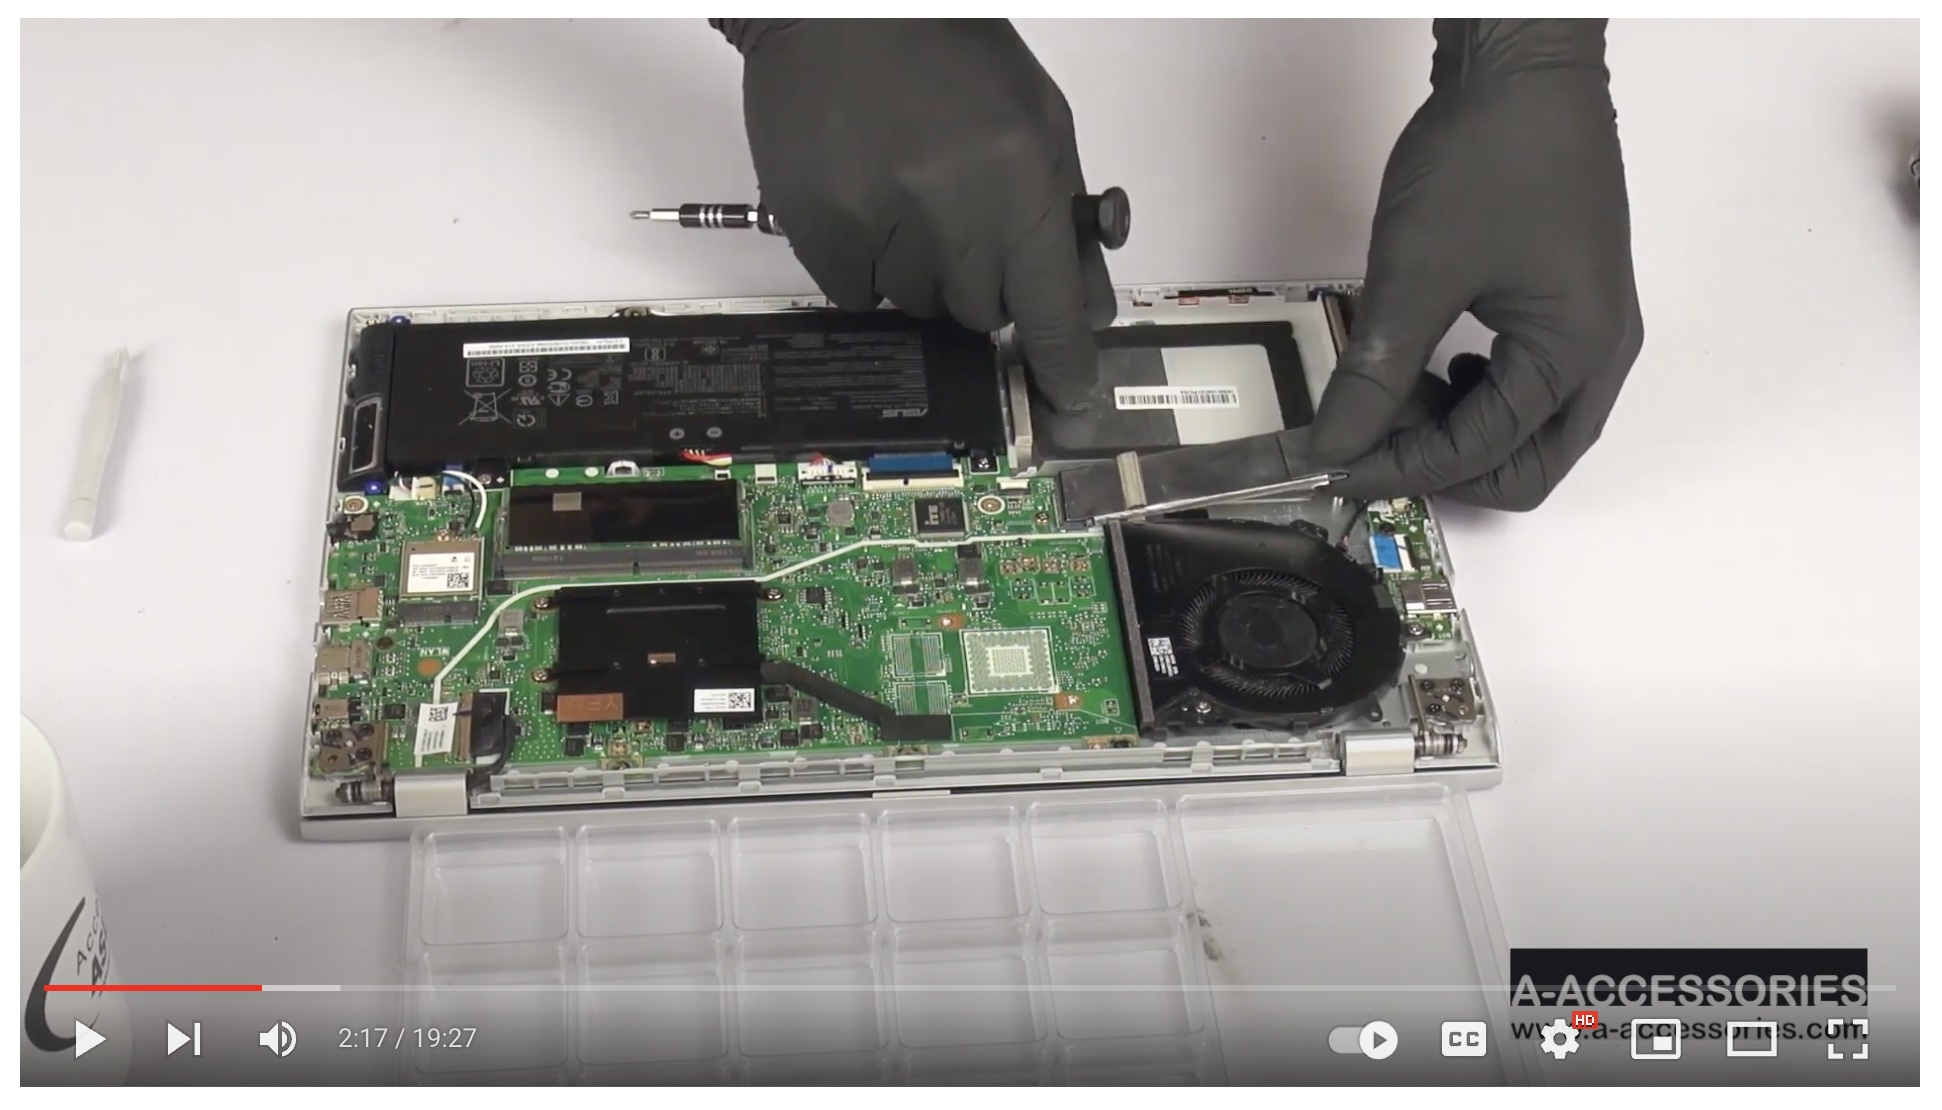
We recommend starting with the easiest, the main hard drive (M.2 SSD) which is adhered with a sticker and located right above the thermal module in this model. After that, remove the battery by unscrewing it and gently lifting it out. Now you can remove the speakers located on either side of the laptop. The speakers are connected by a cable that runs between them; you can use your plastic pry tool to gently unclip this cable and unplug it. Take note of where the cables go, this is important for reassembly. Next, you can remove the RAM bar by unclipping the two tabs that secure it on either side, then unscrew and remove the adjacent WiFi card. You can then move on to unscrewing the thermal module which is also attached by a small connecting cable. Gently remove the rest of the cables including the keyboard cable, touchpad cable, and LVDS/Screen cable.
Step 4: Detach Screen from Hinges
Once the screen cable is disconnected, you can remove the six screws from the hinges and lift them up. Now, gently remove the screen from the bottom of the laptop.
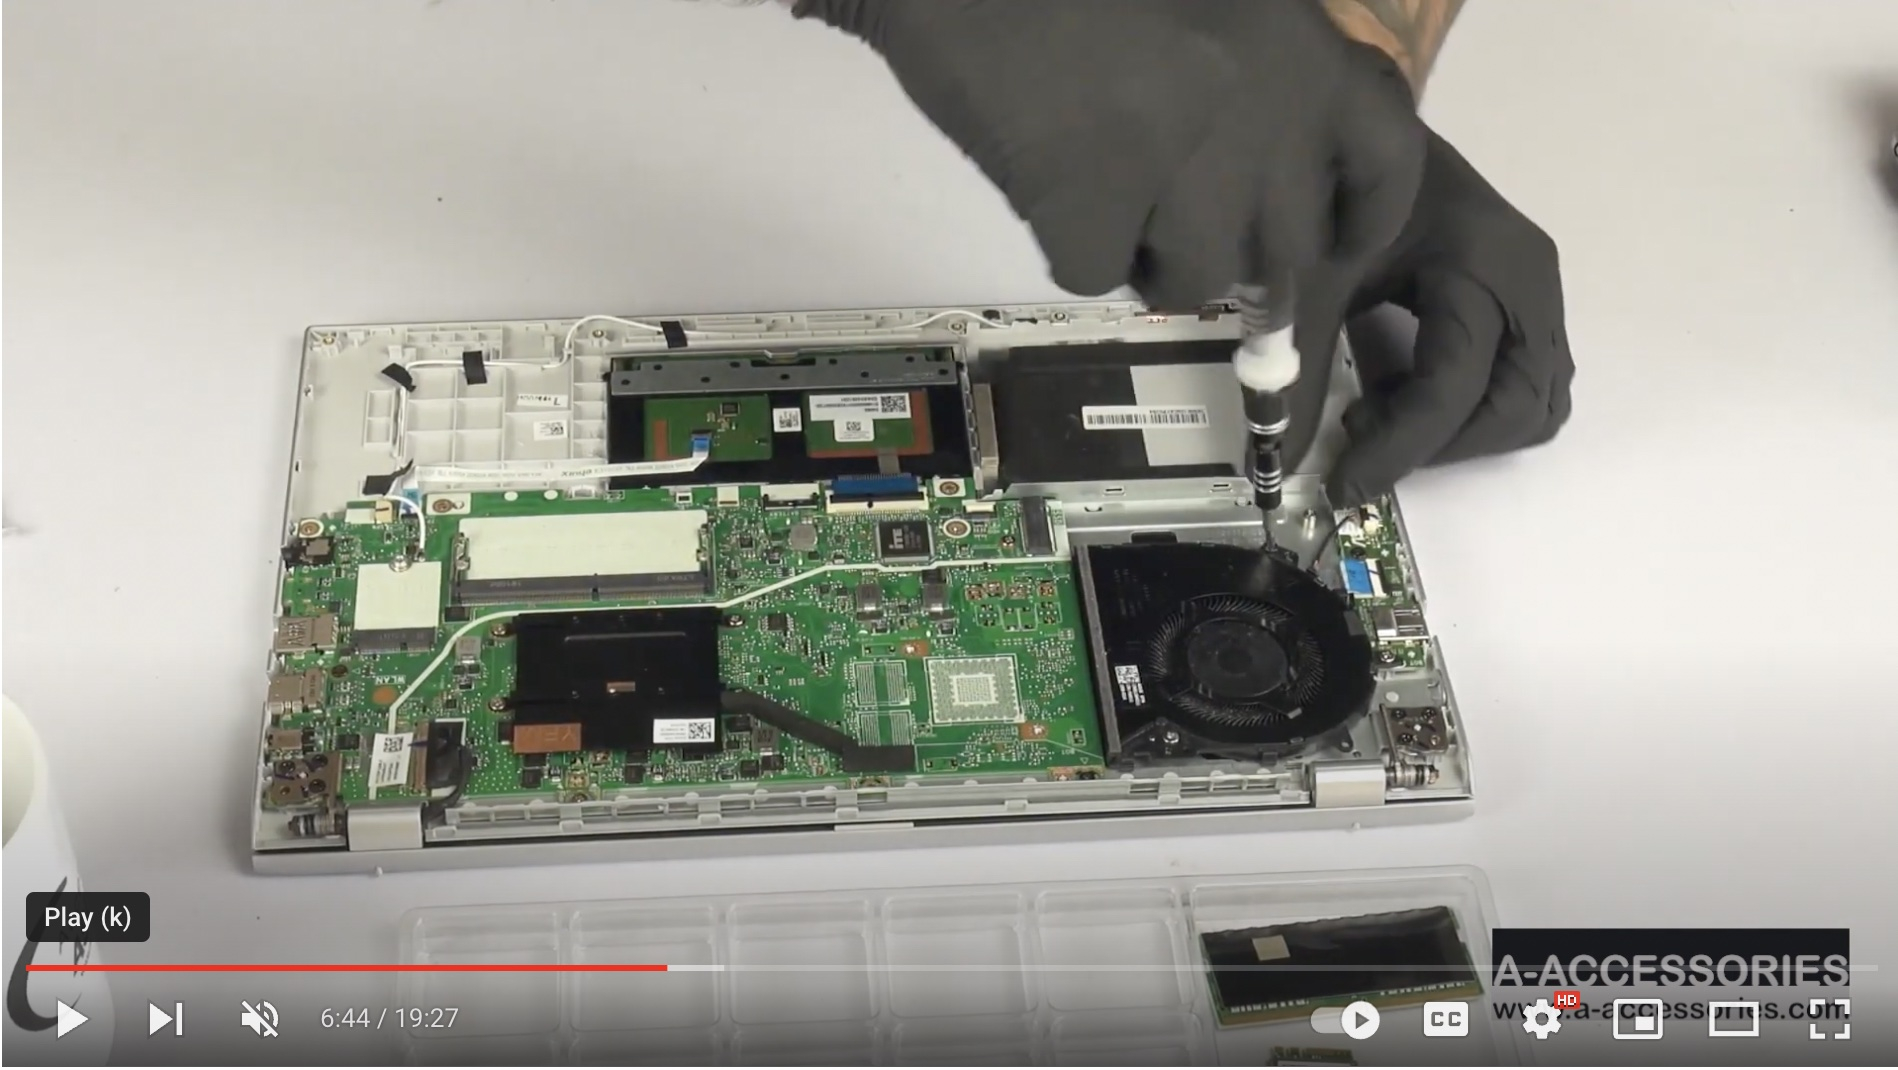
Step 5: Remove the Motherboard
Remove all the remaining screws from the motherboard, then locate the USB cable to detach that as well. Now completely remove the motherboard from the bottom case.

Step 6 : Remove Numpad and USB Card
The USB card is attached with one screw. Remove this screw and lift out the USB card. The NumPad has three screws and one piece of tape to be removed. Make sure you are using the appropriate screwdriver bit so as not to damage any components or screws.
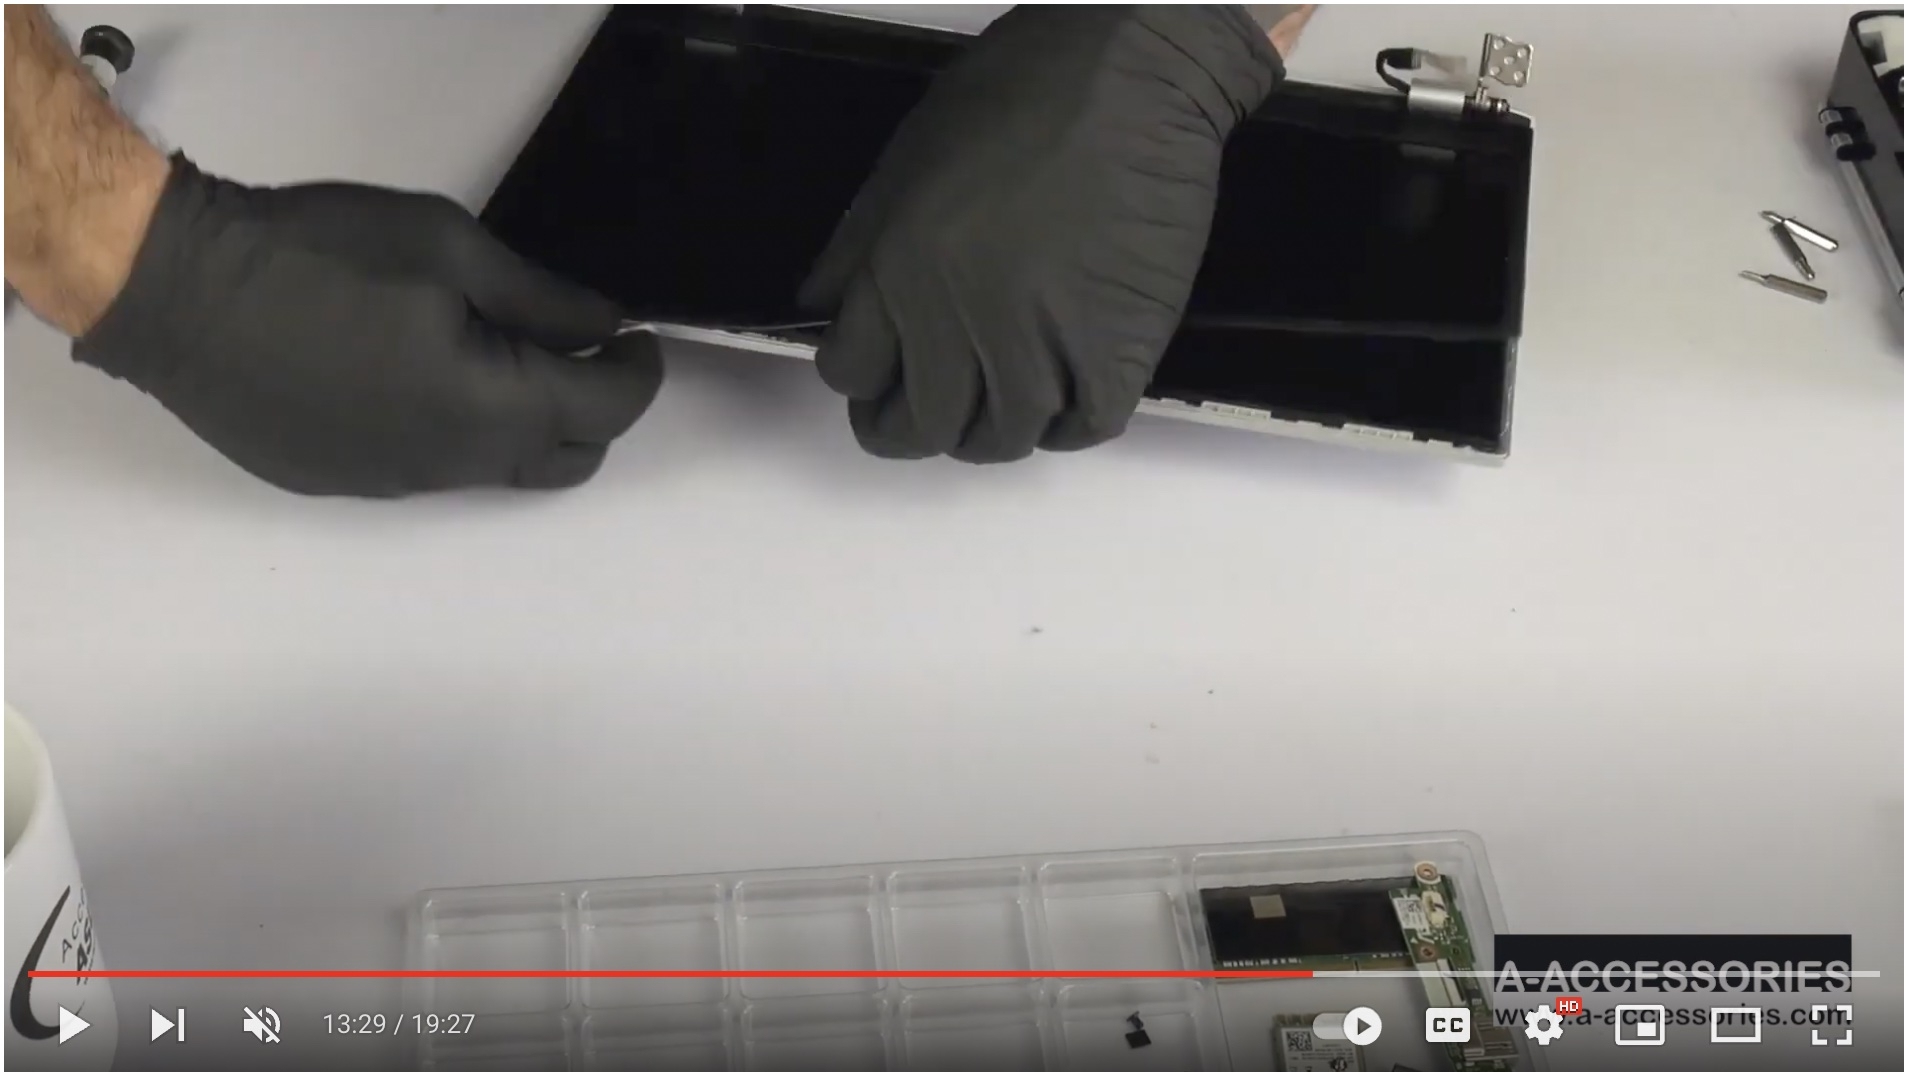
Step 7 : Disassemble the Screen
With the plastic prying tool, remove the screw covers on both sides of the bottom bezel of the screen. Remove both screws. Using the prying tool again, work your way around the bezel, separating it from the screen of the laptop. Once the bezel is removed, unscrew the three screws from each hinge and the two screws at the top corners of the screen. Using the plastic tool, gently lift the screen panel out of the top case of the computer until you see the connecting cable. Remove this LVDS cable before proceeding to take out the screen panel.
Step 8: Reassemble the Laptop
Once you have replaced or upgraded any necessary components, it is time to reassemble the laptop. Follow the above steps in reverse order to reattach the top cover, keyboard, and bottom cover. Make sure all connectors are securely attached and all screws and clips are in place. Once you have reassembled the laptop, power it on to ensure everything is working properly.
Thanks for letting Asus Accessories guide you
In some cases, a laptop may need to be disassembled to diagnose and repair hardware issues. This could include problems with the motherboard, battery, or display. Disassembling the laptop allows for a closer inspection of these components and can help determine the cause of the issue. If you have any questions about this procedure or would like product recommendations, feel free to contact our expert team at any time! We offer only authentic, Asus-manufactured components and accessories for all Asus devices.
