


Reading time: 2 minutes
How to replace ROG Zephyrus CPU Fan
One of our most searched for parts is the CPU fan for the Asus ROG Zephyrus GA401. Your CPU (central processing unit) is the “brain” of your laptop and therefore is usually working pretty hard to say the least, especially in a high tech gaming computer. The CPU fan’s job is to cool this important component as it creates heat carrying out all daily tasks we expect our laptops to accomplish. By properly upkeeping your computer's cooling system, you can extend the life of all its components. For this reason, Asus Accessories offers you here a simple tutorial on how to replace your CPU fan.How to know if my CPU fan needs to be replaced?
As mentioned above, the CPU is really the most important component of your laptop; the processor creates heat as electricity is passed through it as it processes information. If the CPU fan is not working properly, the heat will become trapped and you will notice your keyboard becoming uncomfortably warm. Another indicator that you need a new CPU fan is if you hear unusual noises from your computer such as rattling or grinding. This could mean that your fan is not receiving sufficient power from your motherboard and needs to be replaced. Other signs would be if your laptop in general is struggling to boot up, freezing, or shutting off unexpectedly. These last symptoms could of course be indications of other problems, but if they happen in conjunction with overheating or strange noises, it's a good idea to check your fan.Now that you've ascertained you in fact do need a new CPU fan, here are some easy steps on how to replace it:
Step one
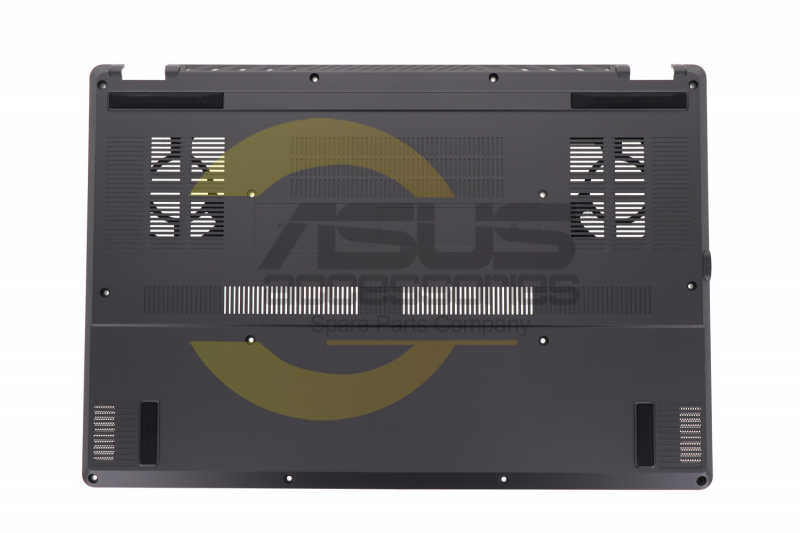
Ensure your Zephyrus is powered off and lay it upside down so the bottom is facing you.
Step two:
Remove all the screws in the bottom case. In the GA401 model, you will find 14 Phillips head screws. Once removed, be sure to place all 14 screws in a safe place so you do not lose them. To assist you in this repair, we offer a complete tool kit on our site that includes everything you need to repair your Asus devices.
Step three:
Using a flat plastic tool, work your way around the seam of the bottom case until it pops out of place.
Step four:
Disconnect the battery cable from the motherboard.

Step five:
Using light pressure, remove the strips of tape from each side of the two fans. Don’t worry, your replacement fan will include new tape as well. Now you can go ahead and remove the two screws on each fan.

Step six:
Locate the small white fan connectors (circled in yellow) under the fan and disconnect them, one on each side. Once this is disconnected, remove the 8 screws (circled in green) from where the fan connects to the CPU.

Step seven:
Unplug the EDP cable indicated here with a yellow arrow, then remove the memory card by lifting the cover and unscrewing the single screw that holds it in place. When the memory card is removed, it will reveal two connectors you can now detach. Now, using a plastic instrument you can gently lift the entire thermal module out of place by working your way around. When the thermal module is removed, you may have to use isopropyl alcohol to clean up the leftover thermal paste.

Step eight:
Now you can simply reposition your new fan and retape it into place. Repaste the thermal paste onto the module and put it back into place. Then begin the process of reattaching the cables and rescrewing all the screws in reverse order, starting with the white fan connectors.
After you have followed these steps in reverse order, your new fan will be good to go!
Asus Accessories is proud to carry all parts for the ROG Zephyrus GA401 notebook including batteries, keyboards, speakers and more. Also check out our full range of parts for Asus tablets and even smartphones.
For more in depth tutorials, check out our Youtube page and if you have any questions, don’t hesitate to contact our service team.
